Saturday, December 31, 2011

Roasted Butternut Orzo with Walnuts and Garlicky Greens

Armed with whole grain orzo, anything is possible. Especially if you happen to have a chunk of leftover roasted butternut squash idling away on the top shelf of your refrigerator. (If you're looking for a feasible and delicious New Years resolution, I highly recommend committing yourself to sticking a halved butternut squash in the oven one night and then congratulating yourself on your good sense and culinary prowess for your next two to six meals. One of which should involve making this.)


Ingredients
Just under 1 1/4 cups broth
1/4 cup broken walnuts, lightly toasted
2 small to medium cloves garlic, smashed
About 3 cups sliced greens (e.g., spinach, mustard, chard, and/or fava greens)
Slosh white wine
Salt, to taste
1/2 to 1 cup flat-diced* leftover roasted butternut squash
Liberal sprinkling white pepper
Pinch or two Meyer lemon zest
1/2 cup grated Parmesan cheese


Bring broth to a boil in a covered pot. Add the orzo, replace the cover, and turn the heat down to low. Simmer 9-10 minutes or until al dente. If there is extra liquid left at the end, simmer with the cover off for a minute until it evaporates.

Meanwhile, heat a wide saute pan over medium heat. Add a glug of olive oil and then the garlic, pressing it into the oil until it gets light hints of gold on both sides. Stir in the greens and a pinch or two of salt and saute, stirring, until they wilt. Add a slosh of wine and saute for a moment more, then gently stir in the squash and saute until heated through. Turn off the heat, add the cooked orzo, white pepper, lemon zest, and half the cheese, and stir to combine. Spoon into preheated bowls, and top with the rest of the cheese and the walnuts before serving.


Serves 2.

*As in, kind of like dicing, only imagine the cube you'd get and cut it in half to get a flatter square or rectangle. I don't understand why there's not a proper cooking term for this, since it's the perfect cut for so many things (mango over fish or chicken, butternut squash in risottos and pastas, apples or pears for a salad). I am hereby officially coining the term flat-dicing, unless someone can think of a better one, especially something that starts with Z. Zletting. Zanziputting. You get the idea.

Wednesday, December 28, 2011

Sauteed Tatsoi with Ginger and Coconut

I never knew what to do with bok choy or tatsoi (a similar, slightly spicier and more tender leafy vegetable) except stir-fry them, until we came up with this. As far as I can tell, it's an addictive side dish by day, and a caped crusader that banishes any incoming colds by night (something about the ginger-garlic-leafy-green combination?). It's also the winner, in my book, for how to prepare roasted breadfruit, although if for some reason you don't happen to have a breadfruit on hand—perhaps because you've been forced back to the mainland by a return plane ticket that refuses to listen to what strike you as exceedingly compelling arguments about the fact that you have sand on your toes and clearly can't leave just yet—just make this without. It will still be delicious.


Ingredients
Olive oil
2-3 heads young tatsoi (or substitute baby bok choy)
1 clove garlic, slivered
1 tsp or so julienned fresh ginger
Pinch or two salt 
1/4 cup coconut milk (light or regular)
Optional: Some leftover roasted breadfruit, broken into smallish pieces (about 1/4 - 1/2 cup)

Heat a glug of olive oil in a pan over medium heat. Add the garlic and ginger and saute for 30-60 seconds or until the garlic just starts to soften, then add the breadfruit if you have it and saute for a couple of minutes, stirring to coat with the oil. Next, add the greens and a pinch or two of salt and toss to coat. Saute, stirring occasionally, until the greens are just wilted.

Stir in the coconut milk, cover the pan, and reduce heat to low. Simmer for just a couple of minutes, then uncover, season with salt to taste, and serve hot.

Serves 2.

Monday, December 26, 2011

Adventures with Breadfruit

Our recent and much-needed vacation in Kaua'i gave us a chance to explore a whole new set of whole foods. The hands-down winner for weirdness (from our limited mainland perspective) was breadfruit—that round, green thing behind the papayas in the picture to the right—which we found first on a labeled tree in the Limahuli Botanical Gardens, and then growing by the side of the road as we hiked down to a beach on the north shore, and then in the weekly Kilauea farmer's market on a Thursday afternoon. The third time, we grabbed it.

Then we took it back to our little rental cottage, set it on the table gleefully, and wondered what on earth to do with it.

According to the internets, which we fortunately had, you can roast it over a fire for an hour. We didn't have a fire, but we had a Weber, and so we stuck it on the grill for an hour (medium heat, lid closed, in case you're thinking of doing this yourself) until it was charred on all sides and the stem end softened enough to yield a bit to firm pressure. Whereupon we removed it from the grill and photographed it. Obviously. Because that is what you do when you've cooked a breadfruit for the very first time.


Then we tried a variety of things.

Thing #1: We followed more internet advice and halved the breadfruit, peeled off the outer shell, scooped out the inner seeds, and sliced it. Only we, um, kind of dropped it somewhere between the grill and the cutting board inside, because it turns out holding it by just the stem isn't the fool-proof idea it seems when you first pick it up, so it didn't so much slice as break apart into pieces. Then we served it, hot, with butter, salt, and pepper. It was totally different from anything we'd ever eaten, and okay. Not mind-blowing, but worth it just to try.


Thing #2: We fried leftover breadfruit pieces in butter (they're kind of reminiscent of potato or sweet potato, only not), and served them with a papaya. This was better, although still a bit dry. Probably if you used a ton of butter, it would work well (don't try using olive oil...the taste is too strong for the mild breadfruit flavor).


Thing #3, and the winner, was to cook it with bok choy or tatsoi in a little coconut milk. Recipe coming soon to a blog near you.

Till then, I will be here, home again, complaining about the sudden change from summer to winter and the claustrophobic nature of socks.

Friday, December 9, 2011

Black Cod in a White Wine Butter Sauce

Don't judge. Just listen.

There's this whole world out there. We talk of Aztec spinach and dandelion greens, investigate the optimal roasting conditions for kale, rehabilitate beets, but what's a paltry reconnaissance of a single vegetable compared to this? The ocean covers 71% of the earth's surface, and it turns out its inhabitants are delicious.


Here's a very simple spin-off of the previous halibut recipe, which worked perfectly for the sustainably fished, wild Alaskan black cod that we found at our co-op tonight.

Serve this with sauteed greens and black Forbidden rice cooked with sauteed shallot, or basmati rice with a little butter and ginger (simmer 1 cup basmati rice in 1 1/4 cups water for 15 minutes, then melt about a tablespoon of pastured butter in a small pan, add a pinch or two grated fresh ginger, saute for 15-20 seconds, and fold into the cooked rice).

Ingredients
2 fillets of a fresh mild fish, like black cod (sablefish) or halibut, preferably wild and sustainable
Olive oil
1/4 cup chickpea flour
1/4 cup stone ground whole wheat flour
1/4 tsp kosher salt plus extra for sprinkling
Freshly ground black pepper
1 tbsp pastured butter
1/4 cup white wine
Juice of 1/2 Meyer lemon
2 tbsp chopped flat leaf parsley

Combine the flours, salt, and pepper, and dredge the fish to cover lightly on all sides. Melt the butter in a small pot over medium-low heat, add the wine, and let simmer while you cook the fish.

Heat a nonstick pan over medium heat. When hot, add a glug of olive oil and swirl to coat, then add the fish. Sprinkle with a little extra salt and pepper. Cook until the bottom is golden brown (the black cod signaled this by curling its sides slightly away from the pan), then flip. Serve just before the fish cooks through (again, the cod made this easy: at the perfect time, it pulled apart a bit of its own accord to show that its center was just moments away from cooking through).


Serve the fish over the rice, then decant the reduced wine and butter mixture into the pan and stir in the lemon and parsley. Simmer for 10-20 seconds, turn off the heat, and use a spoon to drizzle sauce over the fish and rice. Pairs well with baby greens sauteed with a little olive oil and garlic.

Serves 2.

Thursday, December 1, 2011

Pan-Roasted Halibut with Smoked Bacon and Lemon

Fish and I have a long and complicated history. Long ago, when I was young...last weekend, to be precise...I would have summarized our relationship as follows: (1) Raw fish is wonderful (except sea urchin "roe," which I vote we put in a separate category devoted to parts of animals I'd rather not think about). (2) Cooked fish is meh (technical culinary term; exceptions include salmon when we cook it or when ordered at Alouette; trout when my mom cooks it; unagi in good sushi restaurants). (3) Shellfish get more complicated and are not included in this summary in the interest of reader sanity.


As of last weekend, however, my carefully ordered fish worldview has been shattered, and it's just the latest in a long list of overturned culinary preconceptions. Could it be that my once extensive and carefully cataloged collection of disliked foods were all over-generalizations? That it's just a matter of finding the right way to cook something?

In any event, I now love halibut. LOVE halibut. At least when it's made like this (loosely adapted from here).

Serve this with a black Forbidden rice pilaf (Heat a little olive oil in a pot over medium heat. Add a shallot, chopped, and saute until soft, then add the rice and stir to coat the grains. Stir in 1 1/4 cups vegetable broth and bring to a boil. Turn the heat down to low and simmer gently for 20-25 minutes, or until the liquid is absorbed and the rice is tender).

Ingredients
2 halibut fillets
1/4 cup chickpea flour
1/4 cup stone ground whole wheat flour
Kosher salt
Freshly ground black pepper
Ñora pepper (optional)
Olive oil
2/3 to 1 strip Niman Ranch applewood smoked bacon, sliced crosswise into strips
1/2 cup white wine
Juice of a little over half a Meyer lemon
1-2 tsp sliced castelvetrano olives (cured with salt rather than pickled, and therefore an olive even an olive-hater can love...available at Whole Foods and the Sacramento Co-op)
2 tbsp chopped flat leaf parsley
2 tbsp pastured butter

About ten minutes before you need it, take the fish out of the fridge so that it's cool rather than cold when you start to cook it. Mix together the flours, 1/2 tsp salt, and peppers to taste in a shallow bowl. Coat the fish on all sides with the flour mixture just before you start cooking.

Heat a nonstick pan over medium heat. When hot, add the bacon and cook, stirring occasionally, until the pieces start to turn golden brown along the edges, lowering the heat a little if needed. Remove with a slotted spoon and let dry on a paper towel. Pour out most, but not all, of the bacon grease, and return the pan to the flame.

Add a couple tablespoons of olive oil, stir, and increase the heat back to medium. Set the fish in the pan skin side down. Jostle the pan a bit to make sure they don't stick, and sprinkle the tops with a pinch of salt and a little extra black pepper. Let sizzle for 4 minutes or until lightly golden along the edges, then flip gently with a spatula or flat nonstick tongs. Cook for another 3-4 minutes or until golden brown, then flip back. When the fish is almost done, it may fall open a bit along a seam. The inside should be nearly cooked through, with a little bit of the center still translucent. Remove the fish from the pan immediately—it will cook through the rest of the way from its own heat.

Add the wine, lemon juice, butter, and 1 tbsp olive oil to the pan and bring to a strong simmer. Cook for about a minute, then add the olives and most but not all of the parsley. Continue to simmer for another couple minutes until the sauce is reduced and somewhat thickened. Turn off the heat, and add the bacon to the sauce to reheat.

Serve the fish over black rice, spoon the sauce liberally over both, and sprinkle with a little parsley and a bit of black pepper if desired. Pairs very, very well with roasted kale and a glass of Torrontés (like Urano's Torrontés from Mendoza, Argentina, available at BevMo).


Serves 2.

Sunday, November 27, 2011

Leftover Roasted Chicken Panini with Peppers and Caramelized Onion

Thanksgiving always raises a multitude of deep and important questions. Should the turkey be stuffed or unstuffed? Six side dishes or seven? Pumpkin pie or pecan? Why are the neighbors putting up Christmas lights before Thursday, and if they're planning that far ahead, where are their Valentine's day decorations? And is there any way to gracefully uninvite your cousin's sister's nephew's socially awkward girlfriend from coming to dinner, or at least to misdirect her GPS so she ends up at someone else's house?


But perhaps the most pressing question tends to emerge unexpectedly the day after Thanksgiving, just when we have been lulled into a false sense of tryptophan-imbued security. It's the question of leftovers. In particular, it is the question of what on earth to DO with all the leftovers. Especially after the fourth helping of leftovers shows no sign of diminishing the vast store left in the fridge.


Obviously, the best answer is the Thanksgiving leftover sandwich. Until you consider that this sandwich could be grilled, and then you realize the Thanksgiving leftover PANINI is the best answer. (Paninis, incidentally, are the answer to 83.4% of the world's leftover problems, according to recent numbers I made up in my head while eating one.)* The other answer is not to make a turkey in the first place, but this is considered weird and unpatriotic if you're not a vegetarian and you might not want to admit to it outright on, for example, a blog. Despite the fact that a discerning reader might notice the lack of turkey in the recipe that follows. But you could totally make this with a turkey. If you had one. Which many people do.


Ingredients (per sandwich)
2 slices good-quality whole grain bread
Olive oil
Leftover roasted chicken, sliced or pulled into pieces
Freshly ground black pepper
A little pepper jack or Monterey jack cheese, grated (optional)
1/4 red onion and 1/4 red bell pepper, sliced into thin half rings and sauteed in olive oil until very sweet
A few baby mustard greens (or sub mustard frisee, arugula, or spinach)

Preheat your panini grill to medium-high. Lightly brush one side of the each bread slice with olive oil (these will become the outside of your panini). Layer your ingredients on the dry side of one of the bread slices: A light scattering of jack cheese first against the bread, then chicken seasoned with black pepper to taste, then sauteed onion and peppers, then a few greens, then the second piece of bread (olive oil side up).

Sandwich your sandwich inside your panini grill and press down lightly until the grill is fully against the bread. Grill until golden brown on both sides. Serve hot.


*You might reply: "Oh, but I don't have a panini grill." To which I would helpfully suggest: "You should totally get a panini grill." To which you might respond: "Oh, but I don't know if I would use it." Which is when I would say: "You know, I think I read somewhere recently that you could solve 83.4% of your leftover problems if you invested in a panini grill, and paninis are just regular old sandwiches that you would make anyway thrown on a grill for a couple minutes, which transmogrifies them into an infinitely more delicious, warm, grilled, succulent, wonderful, amazing, fantastically ambrosial meal." To which you would respond: "Oh, really? I'm completely convinced! What panini grill do you have?" And I would say "I'm thrilled that you're convinced! Our panini grill is a De'Longhi, which is hard to spell and I'm not sure if I have done so correctly, but it makes good paninis regardless." And then we would probably stop conversing because we'd notice that we were only hypothetical and get distracted by whether a panini imagined by imaginary people would taste the same as a real panini, which is one of those Buddhist koans you don't hear as frequently as the hand-clapping thing.

Monday, November 21, 2011

Roasted Butternut Squash Risotto with Leeks, Smoked Bacon, and Sage

After experiencing a deeply inspired pumpkin pizza at Tuli Bistro a few weeks ago, we vowed to recreate it ourselves as a grilled flatbread. Which we haven't done yet, mostly because it's cold and dark and Novembery in the evenings outside in our grilling area, and warm and cozy and light inside in our non-grilling area, which creates a distinct bias toward non-grilling activities. Maybe next summer. In the meantime, we decided to reincarnate the pizza (or at least, its revelationary triumvirate of winter squash, cured pork, and goat cheese) in risotto form.


I don't care if you think bacon and goat cheese couldn't possibly coexist peaceably in the same dish. Neither did we. Make this anyway. Your taste buds will eventually emerge from their deliciousness-induced coma long enough to thank you.

Ingredients
One smallish butternut squash (about 2 lbs), halved lengthwise and seeds scooped out
Olive oil
4 cups veggie and/or chicken broth
1 + 1/2 strips applewood smoked bacon, divided, sliced crosswise (or sub pancetta)
1 large or two smaller leeks, white and light green parts, chopped
1 clove garlic, pressed
1 cup Arborio rice
White wine
8-10 leaves fresh sage, thinly sliced crosswise
2 handfuls arugula
Salt and freshly ground white pepper to taste
1-1.5 oz good-quality goat cheese
Garlic chives, for garnish (or sub regular chives)

Preheat the oven to 425°F. Cut each squash half crosswise into half-inch strips. Arrange in a single layer without crowding on a large, nonstick or foil-lined baking sheet lightly brushed with olive oil. Roast in the oven for 25-40 minutes or until lightly golden on both sides, turning the slices about halfway through. When the squash are tender, remove from oven and let cool. Peel the slices and cut into bite-sized rectangles.


Heat the broth in an uncovered pot over medium heat. When it simmers, turn the heat down slightly and let simmer, uncovered, as you make the risotto so that it reduces slightly.

Meanwhile, heat a large pot or dutch oven over medium heat. Add the half strip's worth of bacon and cook, stirring from time to time, until it starts to turn golden. Turn the heat down just a bit, add the leeks, and continue to saute until they soften. Stir in the garlic and saute for another 20-30 seconds, then add the rice and stir to coat evenly with the bacon-leek-garlic mixture.

Saute the rice for about a minute, then pour in a ladleful of white wine. Let cook, stirring occasionally, until the liquid is absorbed, then add a ladleful of broth. Continue to add broth by the ladleful, stirring and allowing the liquid to absorb before adding more.

Meanwhile, heat a frying pan over medium heat. Add the bacon and fry until golden, then drain off the excess fat and add just a light drizzle of olive oil in its place. Turn off the heat, throw in the sage, and stir a couple times to combine.

When you have just one or two ladlefuls of broth left and the risotto is just tender, fold in the arugula and pour a ladleful of broth over the top to help it start to wilt. Continue to cook, stirring, for another minute or two until the arugula is just wilted. Add in the squash and allow to heat through, then gently stir in the bacon-sage mixture. If the risotto seems dry, add a little more broth. Turn off the heat, and add salt and white pepper to taste.

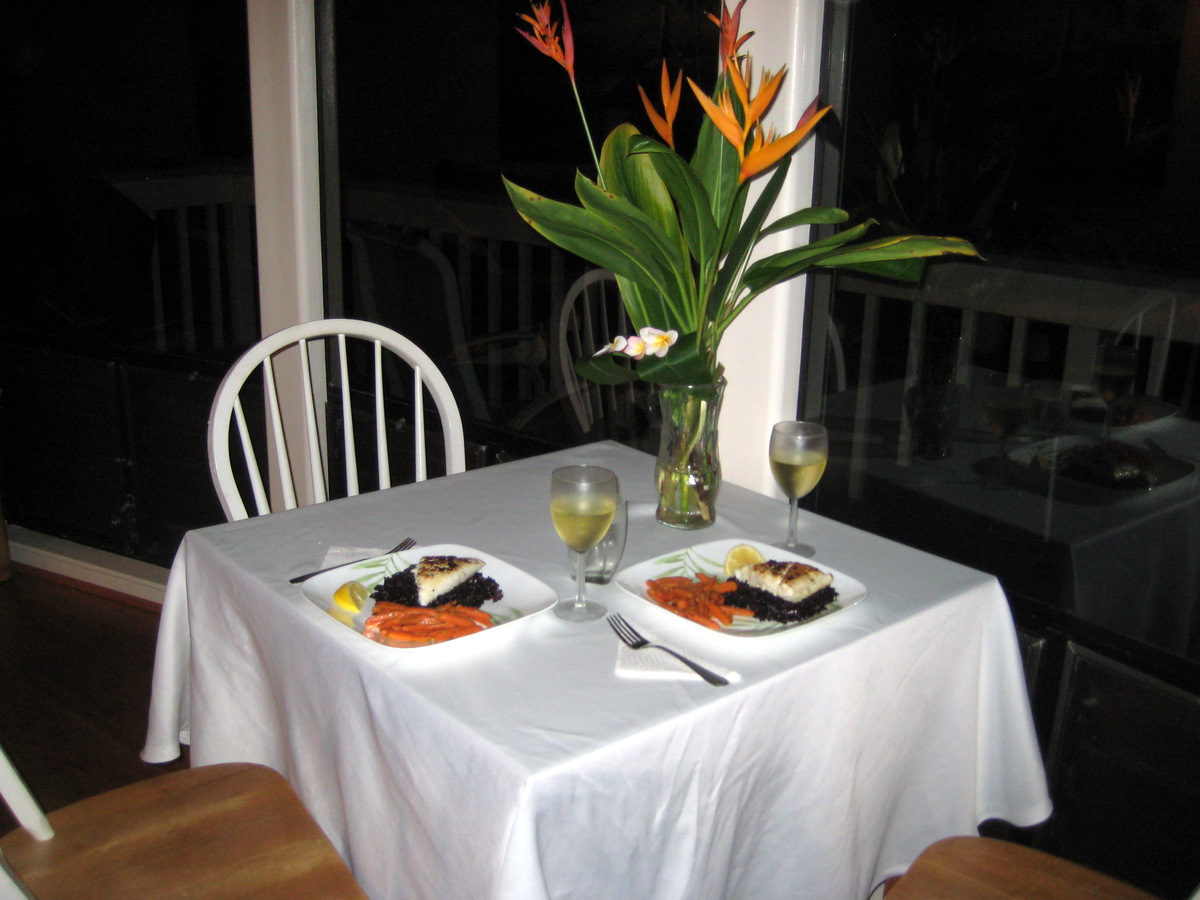
Serve on preheated soup plates, with goat cheese crumbled over the top. Garnish with snipped garlic chives.

Serves 2, and pairs well with Pinot Noir like Talbott's 2009 Kali-Hart from Monterey County, available at our co-op.

Saturday, November 19, 2011

Tales of a Noodle Extruder

I'm not going to say for certain one way or the other, but it's a distinct possibility that one sunny day in mid-October, I asked Santa if I could have a noodle extruder for my husband's birthday.


I realize that at this juncture—despite your best intentions to hear me out—certain pressing questions may occur to you, including but not limited to:

(a) Don't people usually ask Santa for presents for Christmas, not birthdays? and
(b) Aren't these people usually under the age of 10? and
(c) Aren't you not under the age of 10? and
(d) Don't we usually focus on gifts for the person actually having the birthday rather than associated household members? and
(e) What on earth is a noodle extruder?


Fortunately for you, Santa proceeded to actually get me a noodle extruder for my husband's birthday, which means I can answer (e) with pictures. It doesn't really shed light on (a) through (d), except to point out that my request wasn't nearly as futile as you (and, frankly, I) originally assumed. I'm thinking Santa might be a closet foodie.


According to various online dictionary sources, a noodle extruder is: "Not Found," which is in direct contrast to my own personal experience and suggests that the authors of said dictionaries may not be in particularly good North Pole standing.


Which leaves defining a noodle extruder to me. And, technically, Google. Which would probably do a much better job. But you're here now, so why not stay?


Perhaps unsurprisingly, a noodle extruder's main business is to extrude noodles. You put the pasta dough in the top, turn a crank, bounce up and down once or twice before noticing that you're right in front of the kitchen window and several neighbors are passing by looking in curiously, rearrange your facial features into a solemn and nonchalant "whatever, I'm just here extruding some noodles" expression, and then forget yourself in the next instant as you catch a glimpse of the first homemade fusilli you've ever made just starting to peek out (see bounce-inspiring photo above).

Then you cut the noodles, turn the crank some more, stop suddenly as if struck by a brilliant idea, pull down the shade so you can bounce in peace, and continue on your merry way accumulating an entire cutting board full of endearingly misshapen fusilli. Or macaroni. Or bucatini. Or whatever your favorite shaped pasta happens to be.

Of course, there are still a few tricks to iron out. The multigrain pasta dough recipe we use for our pasta machine ended up a little too tacky to make perfect noodles, which need a bit more structure to stand up without folding in on themselves. And perhaps each noodle shape needs its own tailored dough recipe. We clearly won't know until we've tried every one. And because we are selfless, generous cooks who care first and foremost for the welfare of our readers, we are going to do this. For you. And for Santa. Because we care. Also because the kitchen shade is still down, so no one can see if we're bouncing.

Bucatini, anyone?


Sunday, November 13, 2011

Mixed Greens with Garlic and Toasted Walnuts


This turns out to be a perfect side dish for pumpkin soup. Or just about anything else, for that matter. Make it when you have an assortment of dark leafy greens on hand and want something fall-like and delicious and quick to dress up the side of your plate.


Ingredients
Olive oil
1 garlic clove, smashed
Mixed braising greens (e.g., baby mustard, baby kale, chard, beet greens, amaranth greens, etc...chop larger greens or cut crosswise into ribbons)
Splash veggie or chicken broth
Coarsely chopped walnuts
Salt and freshly ground black pepper

Heat a glug of olive oil in a nonstick pan over medium heat. Add the smashed garlic and saute for 2-3 minutes until it softens, then add the greens and toss to coat. Saute, tossing occasionally, until the greens start to wilt. Add a splash of broth, cover, and let simmer and steam for a couple minutes (if using baby greens) or 4-6 minutes (if using big greens). If the pan gets too dry, add a little more broth. Stir every couple of minutes or so.

Meanwhile, toast the walnuts in a pan over medium heat, shaking from time to time, until lightly browned. Remove from heat.

When the greens are tender, uncover the pan, steam off any excess liquid, and then serve on a warmed plate. Drizzle with a little olive oil, sprinkle with walnuts, salt, and pepper to taste, and serve hot.